Send Photos For Color Matching
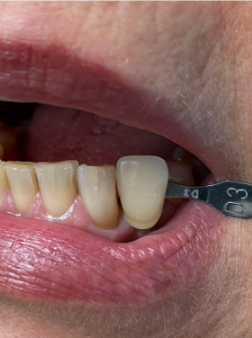
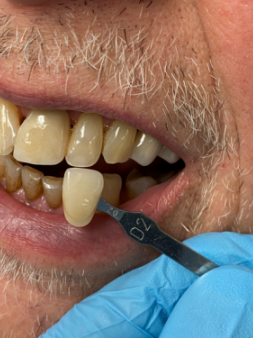
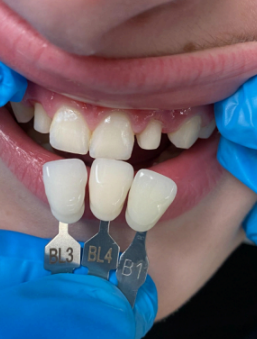
When you send in photos, we ask that you include the patient’s current smile with the shade tab of choice to be used. Please look below to get detailed tips on how to take the best shade photos!
E-mail these photos to our team at casephotos.emanueldentallab@gmail.com with the Dr’s name and the patient’s name in the e-mail or the subject line!
Steps for shade matching
1. PICK THE SHADE FIRST THING, BEFORE INJECTION OR PREPPING: Natural teeth dramatically change color during prepping, so please take your shades prior to any work on the patient. If the shade is not taken at the beginning of the procedure, have the patient return after 48 hours for shade picking. This will allow the time to regain moisture and true color.
2. NO DIRECT CHAIR LIGHT TOWARDS THE PATIENT'S TEETH
3. SET THE CHAIR AT SITTING POSITION.
4. NO RED LIPSTICKS.
5. NO SHADOWS: Have an assistant hold back the lips with their hands very close to the face, so as not to cast shadows on the teeth being shaded.
6. DISTANCE:
The person taking the shades should hold the shade tab at arm's length. It’s easier to see the color and value of teeth at a distance. When zooming in to take a photo, it would be ideal to see a total of 4 to 6 teeth in the image.
7. POSITION OF THE SHADE TAB:
Place the incisal of the shade tab against the incisal of the tooth being matched. Keep the angle of the shade tab parallel to the facial of the tooth you’re matching.
8. TAKE A STUMP SHADE FOR ALL ANTERIOR METAL-FREE CASES:
Using these techniques will greatly improve the end result. Below, I have attached three photos as a reference that were taken with my iPhone 11 Pro Max using the 2x zoom feature.


